 Since getting into the Parks On The Air program a few years ago, it prompted me to build my own version of what is known in the world of Amateur Radio, a Go-Box. That is a radio station that you are able to quickly grab and go at a moment’s notice. Since Amateur Radio’s justification for our frequencies is emergency communications, or EMCOMM, it makes sense that all hams have some sort of Go-box.
There are all kinds of go-boxes out there on the internet. They all have their advantages based on the operator’s needs and requirements. Being one who likes to learn from others, I spent a lot of time searching and looking at other people’s go-boxes. I then chose various features I like and incorporated them into my own go-box.
Here is what I came up with
Go Box Requirements
- Plug and Play – That is plug in power, antenna and go.
- Operate on HF, VHF and UHF frequencies
- Compact and reasonably light
- 100 watts on HF frequencies
- Operate on SSB, CW and Digital modes
- Computer built-in
- Antenna tuner
Go Box Equipment
- Yaesu FT-857D
- LDG YT-100 Autotuner
- Raspberry Pi Computer
- Signalink Sound interface
- K1EL WinKeyer
- Powered USB hub
- Powerwerx USBbuddy 12V to 5V converter
- USB GPS Dongle for grid square / time sync
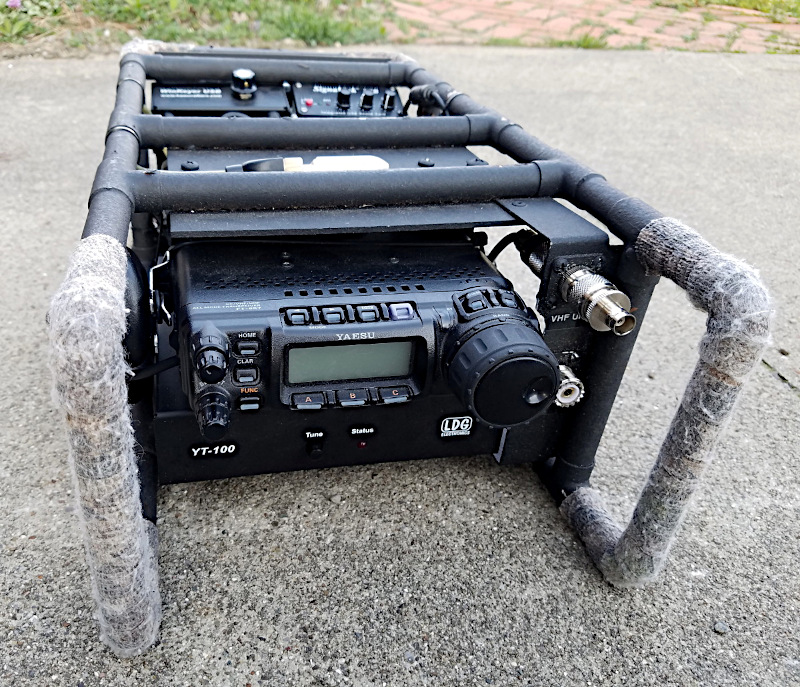
Here is a photo of my completed Go-Box:
As you can see, its not actually a Go-Box, but rather what I call a Go-Frame.

The photo above shows the Yaesu FT-857D and below it the LDG YT-100 autotuner. On the right side you can see the two antenna connections that come from the rear of the FT-857D.
Some really useful ideas in here. Thanks. I’m stuffing mine in a Pelican-type IP75 enclosure. 73’s de AD6AE
Thanks! There are so many ways to make a go box. I have seen a lot of Pelican-type go boxes, and hey all look great. I’m sure yours will work out as well.
— Mike WB8ERJ