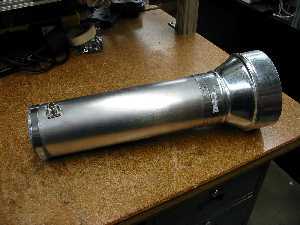
Your wifi cantenna is now ready for use. Enjoy!

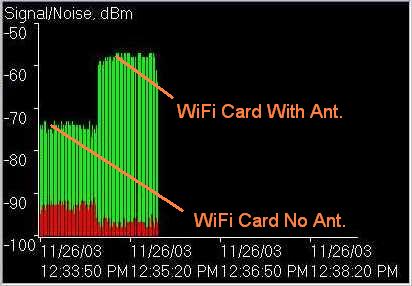
In order to test the results of my new wifi cantenna, I used netstumbler. Here is how I measured the gain. I started up my laptop aprox. 50 ft. from my access point. and let netstumbler take some readings. In the image below, these readings are labeled “Wifi Card No Ant.”. Then I quickly connected my wifi cantenna, which was pointed at the access point. The resultant rise in signal is the gain of the wifi cantenna.

As best as I can tell from the graph, the readings are as follows:
Wifi Card No Ant. = -74 DBm
Wifi Card with cantenna = -57 DBm
Which gives a gain of 17 DBm. Not bad for about $10 of materials, and perhaps an hour of time!
What I would like to do now is address some common questions people usually have with reguard to my wifi cantenna.
Q: How do I connect this to my computer?
A. The simplest way is to purchase a USB WiFi Adapter that has a detachable antenna. Then also buy a very short coaxial pigtail (no more than 3 feet long) that has a Type-N connector on one end and whatever your USB Wifi adapter has on it. Be careful here, as there are several types of connectors on the Wifi Adapter – usually SMA. Even then there are male SMA and Female SMA connectors on the adapter.
Q: If I build one of these do you think it will reach XYZ distance? (how far will it go)
That is a tricky answer, with too many variables. such as, is the other end a “clear line of sight”, In other words, can you see it? What about trees and walls and such? All of these things seriously degrade the signal. Unless you have thousands of dollars of test equipment to test your signal path, I suggest you just build one of these and try it.
Leave a Reply