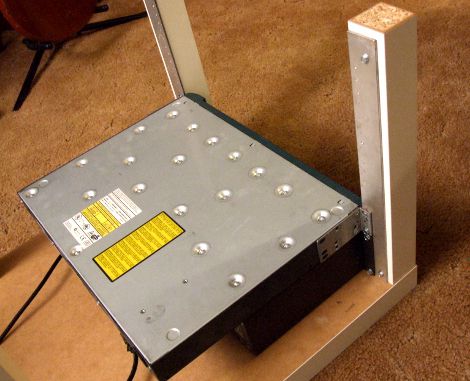
The first thing to do is to assemble the Lack Table. Once that is done, then its time to make it a 19 inch equipment rack. Start by cutting two pieces of 1″ wide 1/8″ thick aluminum 15 inches long. Then take your Lack Table and flip it upside down, and place one the pieces of aluminum up against the inside of one of the legs of the Lack Table. then take a piece of your gear you want to rack and press it against the inside legs of the Lack Table like the photo below:

Next, make sure the piece of aluminum isn’t showing from the front, and mark the top most hole of your equipment (the one closest to the table top) on to the aluminum. Do this for both legs, as this will set the proper width for your 19″ equipment rack. This mark should be 1/4″ from the edge of the aluminum strip.
19 inch equipment racks have very specific dimensions, which can be found here.
I made a template out of a scrap piece of wood based on the dimensions labeled “2U” in the drawing, but instead of drilling a hole for a 10-32 screw in the wood, I drilled 1/8″ holes. This scrap piece of wood can now be used to transfer the proper dimensions of the screw holes on to the 1″ aluminum. Start by lining up the first hole with your first mark. Then take a small nail and tap in in each hole. This will mark the proper dimensions of the screw holes for your equipment rack.
Once they are marked, drill out the marked spots on the aluminum using a 1/8″ drill bit. As you probably noticed, 19″ equipment racks use 10-32 tapped holes for mounting. What I used instead were #10 self-tapping screws. This way, I didn’t have to tap the holes in the aluminum. After both pieces of aluminum are drilled, the next thing to do is to drill a 3/16″ hole at the top and bottom of the aluminum. These holes will be used to secure the aluminum rails to the Lack Table. The top and bottom of the legs are not hollow. These two screws are key to keeping your equipment secure to the Lack Table.
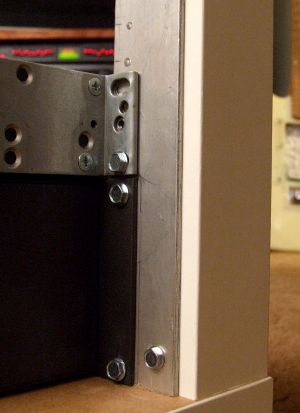
The photo to the right shows one piece of aluminum drilled out with two pieces of equipment mounted.
Also notice the additional screw that is close to the underside of the table, but only screwed into the aluminum. This is the screw that screws into the solid part of the table leg. You will also need one like this at the bottom of the table leg.

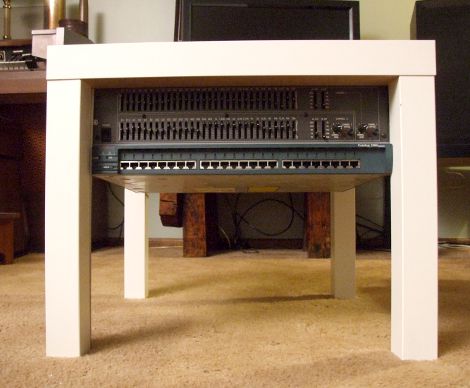
Here is another photo of the completed LackRack:

Although the LackRack is a cheap solution for a 19 inch equipment rack, it is not intended for heavy duty use, and definitely not intended for any sort of a traveling equipment rack.
As an additional option, you might want to add some sort of bracket from the back of your equipment to the underside of the table top. Another nice feature to add is a small light so you can easily see your equipment. While you are at IKEA, you can also pick up one of their many cool lamps for this.
This article was originally posted on mikestechblog.com. Any reproduction on any other site is prohibited and a violation of copyright laws.
Leave a Reply